Motion-Sensor Safe

Description

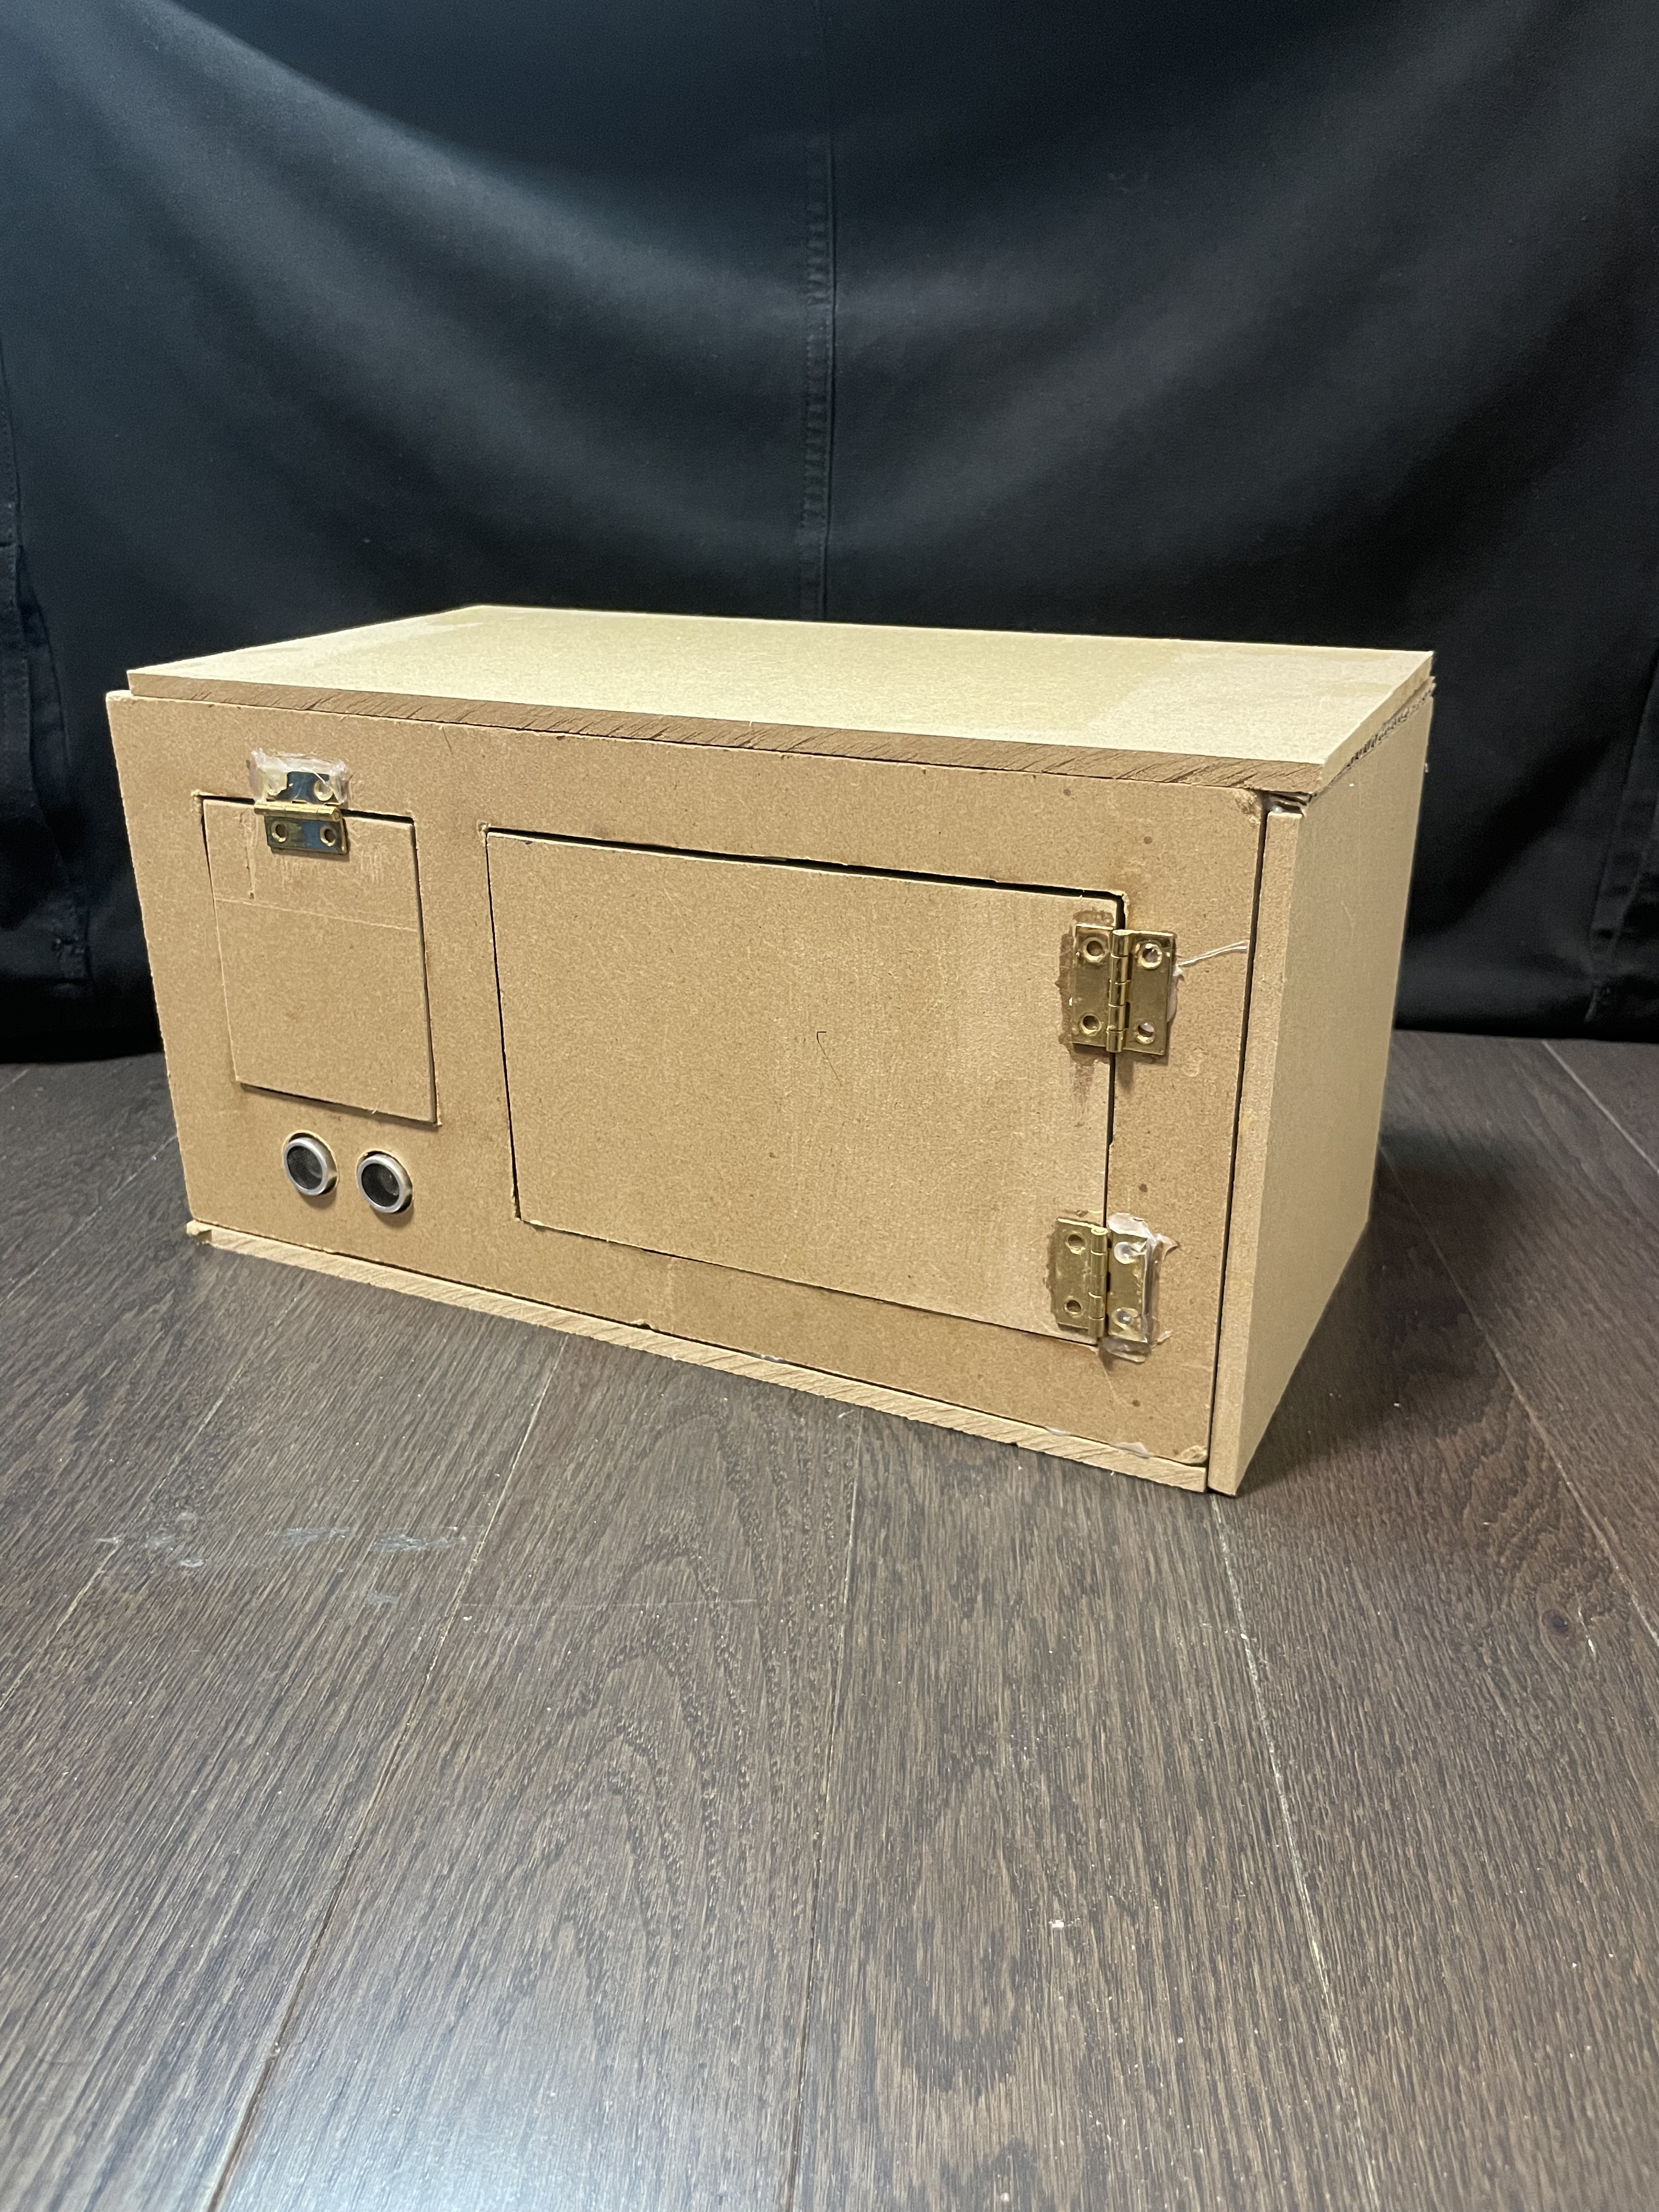
This Arduino UNO-controlled safe opens after a hand is waved around the keypad, in which it opens a door revealing the keypad. Once the correct PIN is entered access to the safe door is revealed.

Problem

I needed a safe that was discrete and didn't scream that it was a safe. My siblings often walk in my room looking for snacks to steal so I had to find a way to prevent them from doing so.

Plan/Solution

Materials Used

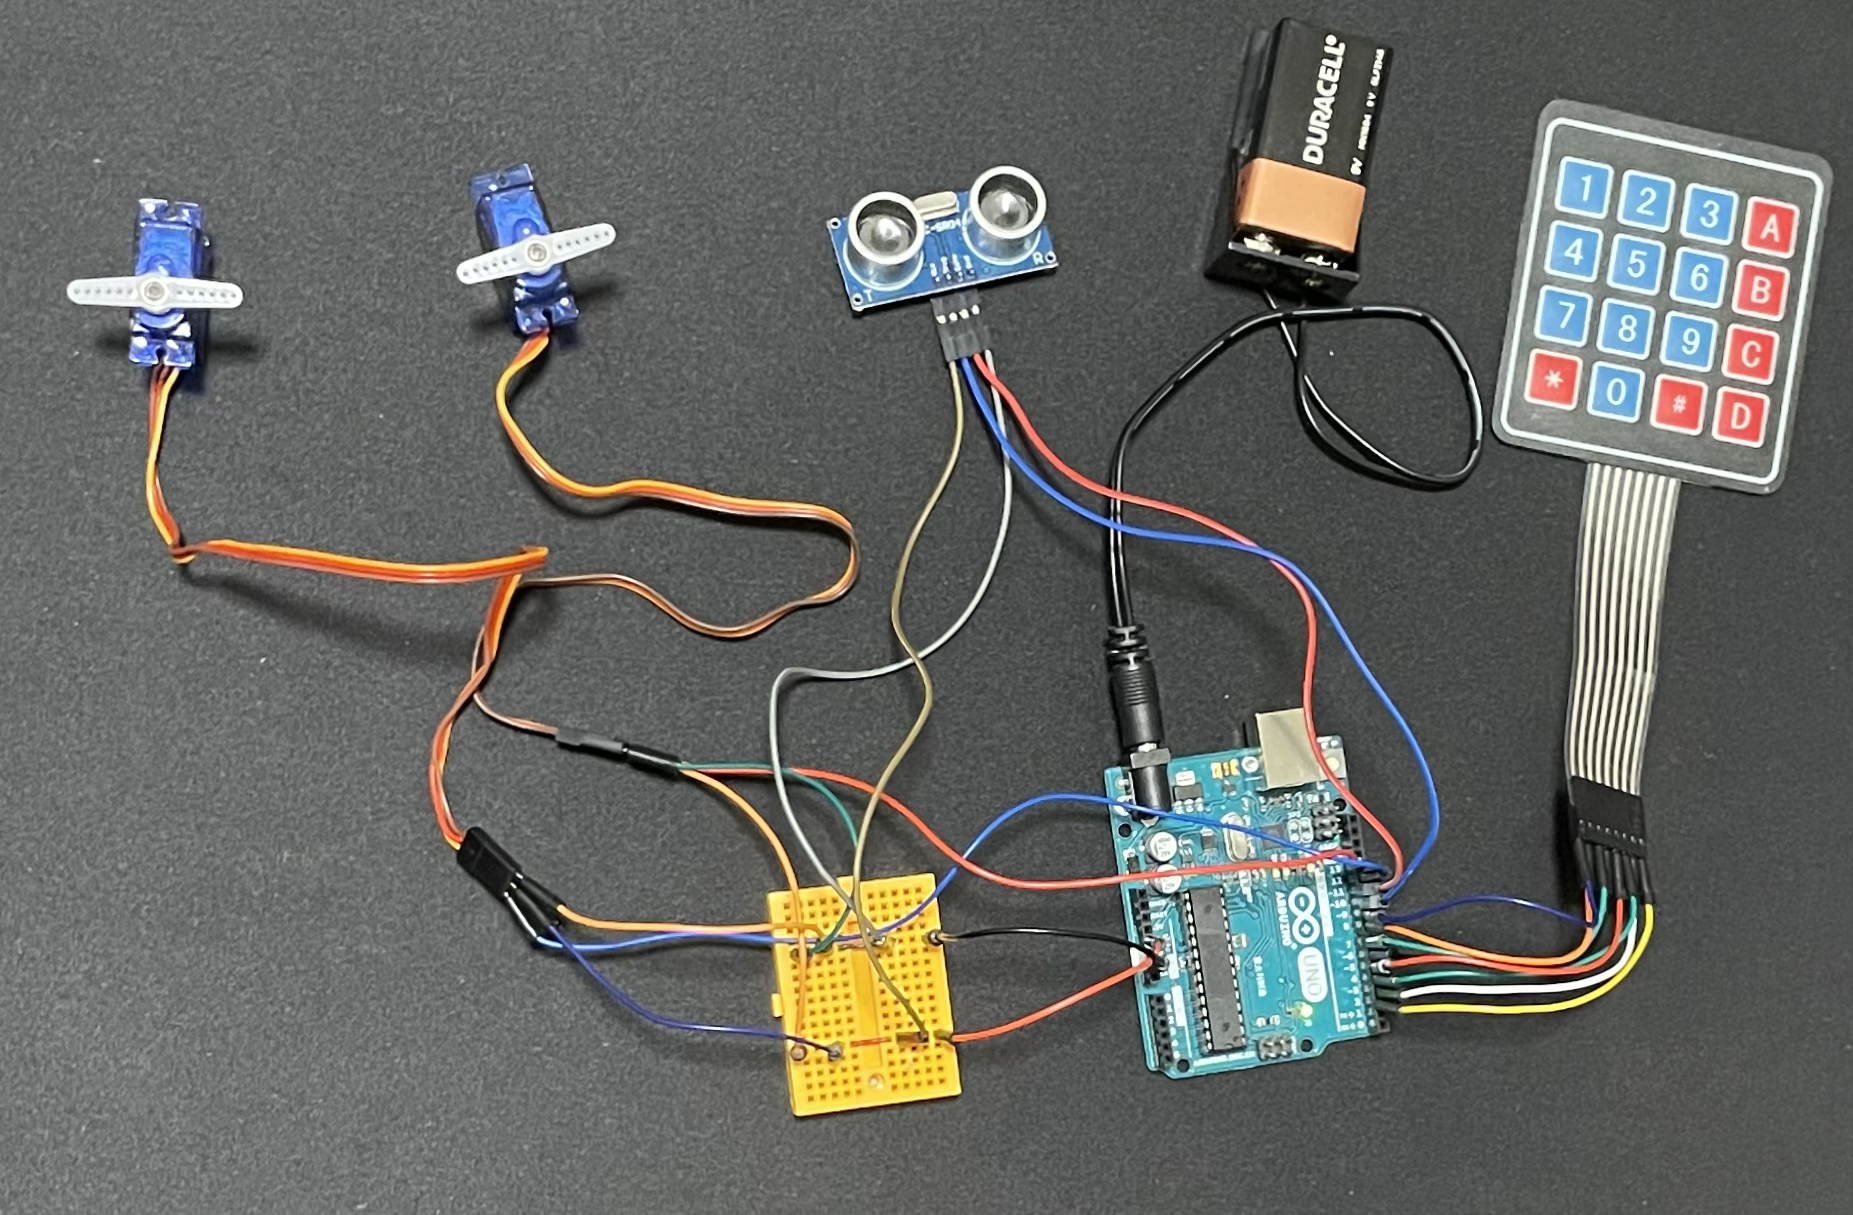
Arduino UNO, various wires, Bread board, 2 servo motors, Distance sensor, 4x4 Keypad
How It Works

  1. Place an object (e.g., your hand) 5 cm away from the distance sensor to open the keypad door.
  2. Once the keypad door is open, enter a 4-digit PIN and press the * symbol to submit it.
  3. If the PIN is entered incorrectly three times, the keypad door will automatically close and remain locked for 2 minutes before it can be reopened.
  4. After entering the correct PIN, the safe door will unlock. Use the magnet key to swing it open.
  5. Place or retrieve your valuables from the safe.
  6. To secure the safe, close the safe door and press the # button to lock it. The keypad door will also close automatically.

Building Process

Body Construction

  • I constructed a rectangular prism using hardboard to ensure a sturdy but lightweight construction and double layered corrugated cardboard triangles to support the overall structure
  • I cut out squares from the hardboard for the safe door and keypad door
  • All of these components were attached together with hot glue

Electronics

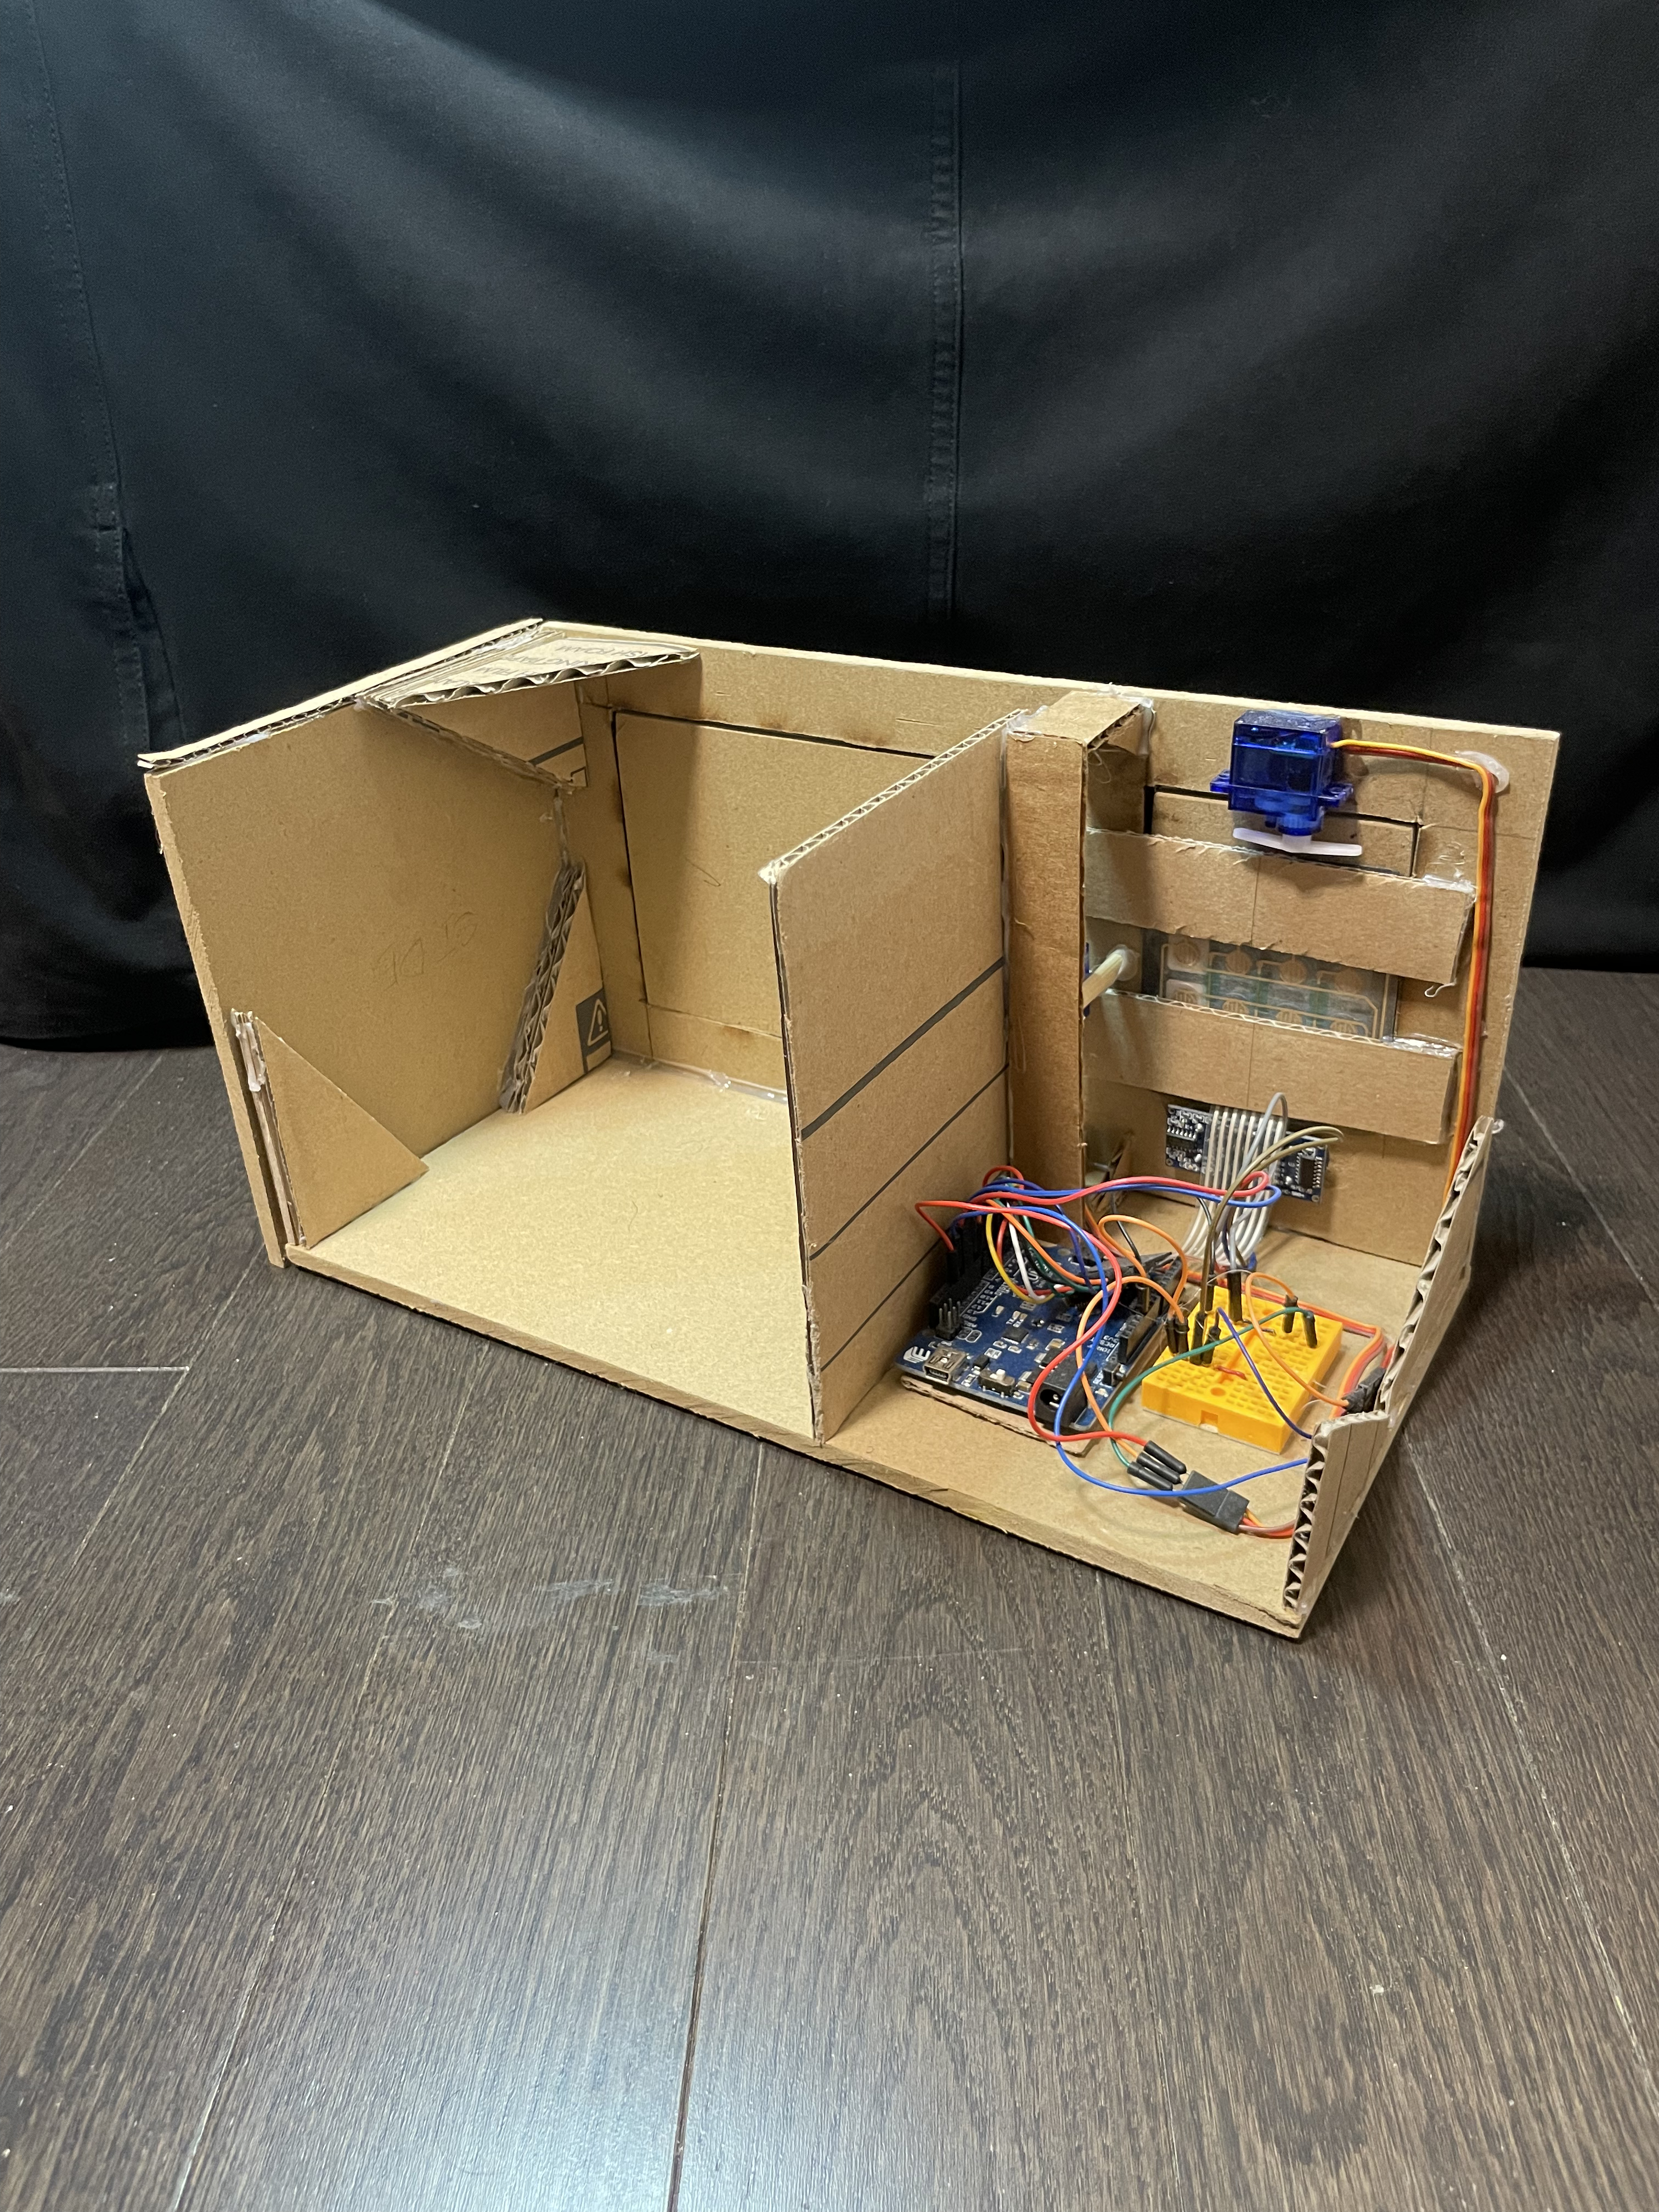
  • Using the Arduino UNO as the microcontroller base, I could control multiple sensors and apply logic to my circuit
  • I used a bread board to organize the separate  I/O pins, ground pins and 5V pins. 
  • I connected 2 servo motors for the keypad door and safe door to pins  on the arduino, respectively, as well as their ground and power pins to the breadboard
  • The distance sensor had its echo pin connected to # and trigger pin connected to # on the Arduino. The VCC and Ground pins are connected to the breadboard once again
  • The keypads row pins and column pins are also connected to the arduino I/O pins (note that there are no VCC or ground pins as this device only picks up inputs, and does not give any output)
  • With all my devices connected, I could then program the logic for the safe

Mechanisms

Door lock

  • The motor rotates 90 degrees to block the door from opening.
  • As the motor rotates back to 0 degrees the motor unblocks the doors path, allowing it to open and close freely
  • *Seen in the How It Works video demonstration*

Keypad Door

  • A servo motor rotates 90 degrees, pushing the top of the door, near the hinge, open. As the servo rotates back to 0 degrees, the door collapses
  • *Seen in the How It Works video demonstration*

Keypad

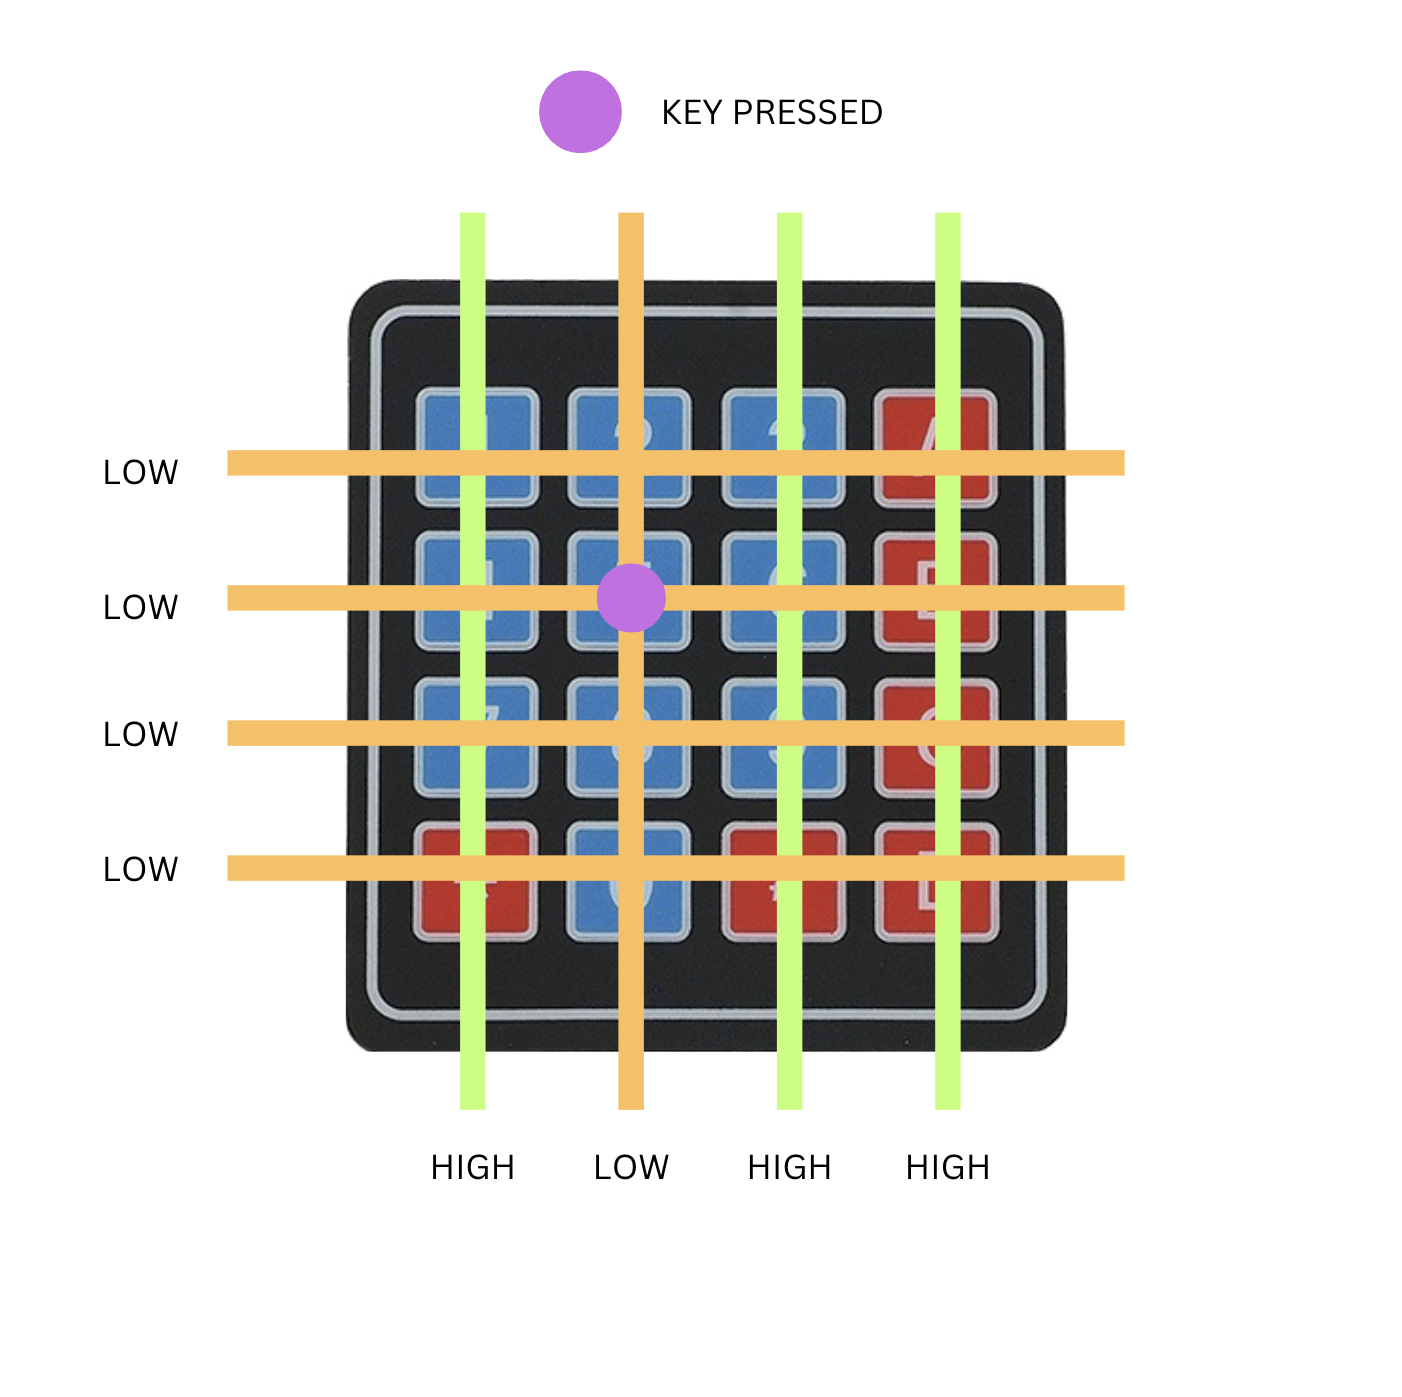
  • The Arduino sends a signal to each row, one at a time, and simultaneously checks the column pins to see if any are receiving the signal.
  • If a button is pressed, the row signal passes through the button to a column pin, creating a closed circuit.
  • By identifying which row and column are connected, the Arduino determines which button was pressed.

Distance Sensor

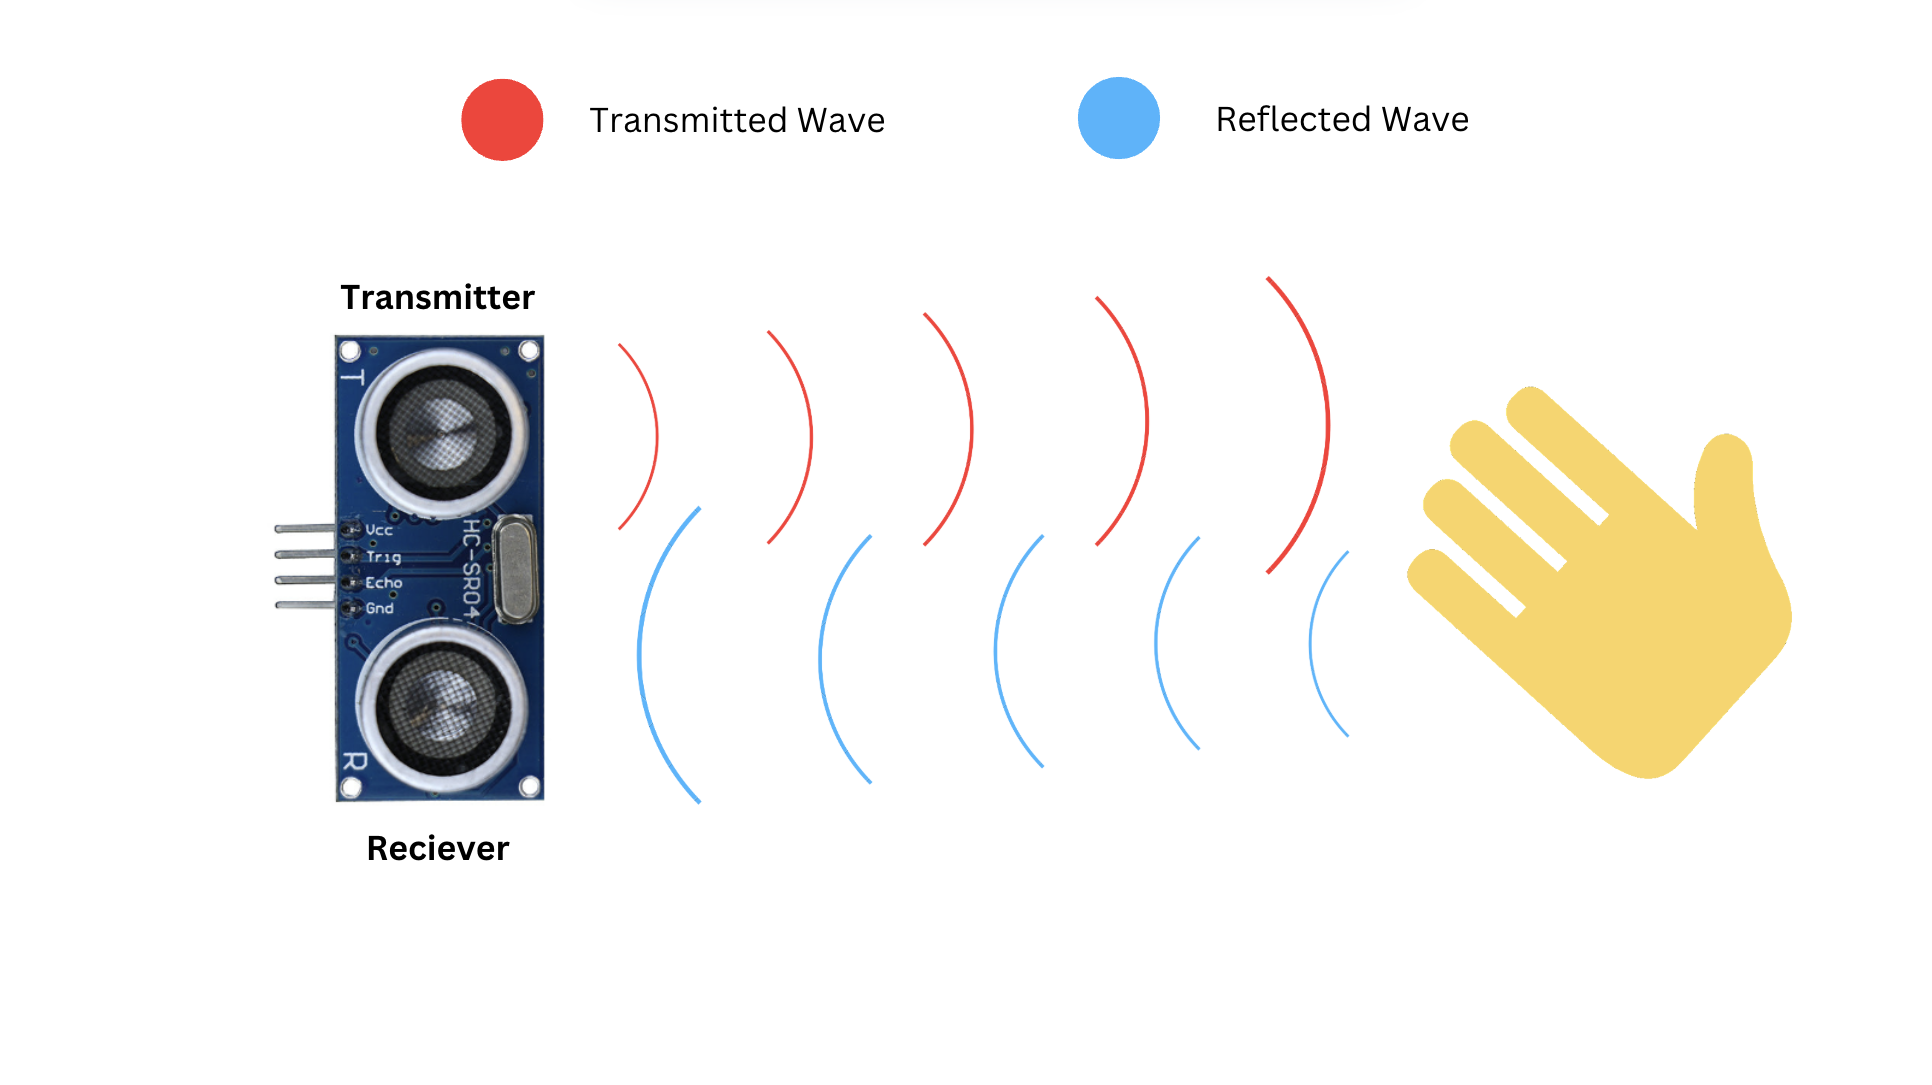
  • The distance sensor works in a similar way to echolocation in bats and dolphins
  • The sensor consists of 2 ultrasonic transducers 
    • One of these transducers (the trigger pin) outputs a sound pulse
    • The other transducer (echo pin) listens for this same sound pulse
    • The sound pulse bounces off objects near the sensor
    • the length of time it takes for the sound pulse to travel to an object, bounce off the object, and be received by the transducer is the value this sensor outputs
    • This value can be used along with kinematics in order to find the displacement an object has, from the sensor

Code

Keypad.ino

Results

I was able to keep my snacks safe!

Challenges/Lessons Learned

Incorrect wiring, causing the circuit to short

  • I fixed this by re arranging the 5V and GND pins after seeing the Arduino’s power light dimming after turning the circuit on